Sunday 2 December 2012

Instructables!

Hey all

Just thought I'd post a link to my very first tutorial on Instructables.com.

The reason I've posted to the 'how to...' there rather than here is that I'm hoping to meet the criteria for the Sew Warm competition.

So here's the link to the Snuggly Panda!


Saturday 17 November 2012

The Crafty Geek

Well, this was an interesting little project...

Sew Today magazine runs a vintage competition whereby entrants are asked to take a vintage Vogue or Butterick pattern and bring it into the modern era by way of styling or materials.  Taking things to the extreme (as I often do) I decided to update the pattern (Vintage Vogue 2962) by using a material that would never have been considered suitable for a dress in the 1950s - clear vinyl. (In fact, it's probably not particularly suitable now - hence the black body stocking underneath...)

However, looking at the winner and two runners up (which you will have to buy the Dec/Jan issue of Sew Today to see), it would seem that I pushed the envelope a little bit too far!

Anyway, at least now I have a nice frock for the next Tron:Legacy themed party...


Wednesday 31 October 2012

Halloween!

Hi y'all

Those of you who follow my blog regularly may have noticed that I haven't been posting very much over the last couple of months.

The reason for that is two fold - firstly, I got a temporary promotion at work which doubled my working hours overnight. And secondly, I was working on the costumes for an amateur production of Dracula, staged by KDC Theatre in London.

As I was the only person in the wardrobe department I found myself filling all the roles.  I was designing, making, buying, modifying, consulting and organizing - and it was a monumental task.

But here are the publicity shots from the show which opened at the Lion And Unicorn last night.


Happy Halloween!

Marilyn and Sally say "Hi"

Monday 22 October 2012

Happy Anniversary! (To us, that is...)

Yes, it has, unbelievably, been one whole year (to the day) that my hubby and I took our vows.  And, as the traditional first anniversary present should be made of paper, I decided to make him a notebook.

In my brief stint as a workshop assistant at The Make Lounge, I was lucky enough to assist in two of Suzanne Cowan's (highly recommended) book binding classes.  She's such a fantastic teacher that, even though I wasn't participating, I still learned a vast amount.

The way I bound my first book isn't precisely how she would have taught me to, but I wanted the spine to look slightly different; so there was a little bit of improvisation.

As Hubby is an absolute Apple Mac nut I also used some basic photoshop tools to add various Mac images to the pages at random intervals.

I thought the end result looked a little too 'homespun', but he absolutely loved it.

The traditional gift for the second year is cotton.  Back to what I do best then, eh?


Tuesday 15 May 2012

Release the bats!


This is my take on a bat-winged top made by Tree on Stitchless TV.


I followed the tutorial up to about 7 minutes in (I didn't used the bondaweb type stuff, though), then simply sliced the garment down the middle,  added bias binding to prevent fraying then added the external buttonholes, and buttons.  

It was my plan to wear this as a kind of spring jacket, but it's so cold in the UK at the moment that I'm still in my winter coat! 

Ah well, maybe in the autumn :-)

Friday 11 May 2012

So Hammy...


Do you ever get those moments when you've worked on something really simple, but you just can't help being 'pleased as punch' about the results?  Well that's exactly how I felt when I made this tailor's ham.


I used this pattern from Sewing Princess and, foregoing the traditional sawdust (as I don't really have much of that lying around since I quit the circus) stuffed it full of fabric scraps.

It's a really quick make as well, if you have your scraps to hand and will prove its worth every time you press a dart or princess seam!

Hooray for the HAM!


Wednesday 28 March 2012

Last minute party bag

This is a really simple, but very cute, sewing project that came about due to an accessory crisis.

A couple of weeks ago I had to go to leaving party (miss you Mark B!) and I didn't want to carry my huge messenger bag, so I thought I'd take along a little crocheted bag I'd made last year.

However....

My dear sweet hubby has a real knack of putting things 'away' and claiming that he's never even seen the item in question.  So, after a couple of hours scrabbling around in various drawers and boxes I decided that the only option left to me was to make a little handbag (yes, I know, technically, I could have popped to the high street and bought a handbag, but where's the fun in that?!)

So, here's how I did it....

You will need:

this bag pattern
top fabric
lining fabric
interfacing or calico (I used calico)
matching thread
bag handles

I used these
 
 
from Ribbon Moon because these were what I had lying around, but I think oval handles would work better with this particular bag shape.


We need to cut two pattern pieces from each of our three pieces of fabric. As the pattern is (mostly) symmetrical you don't have to worry about turning that pattern or the fabric. 

You should end up with six pieces of fabric, the same shape and size. 

Sew the calico onto the top fabric on the wrong side. 

Then place the two, reinforced, pieces of top fabric right sides together and sew, ensuring to leave the top of the bag open. 

Now place the two lining pieces right sides together and sew in the same manner as the top fabric, but lave a 1 1/2 inch gap in the bottom for turning 


Next we need to place the main body of the bag into the newly stitched lining.  The right side of the lining should sit against the right side of the main bag. 
 
Join the the bag and lining together at the bag opening, then pull the main bag through the opening in the lining.  You should end up with something looking like this.

Close the hole in the lining with matching thread (as I was in a hurry I just ran it through the sewing machine, but it's really much better if the lining is hand stitched.)

We are now ready to sew on the handles.

Pin the handles into place and use a whip stitch to secure them.

And you are now ready for a night on the town! 


Monday 27 February 2012

Playtime

At age 12 I attempted, and failed, to turn a basic rag doll shape the right way out.  I assumed, back then (in the eighties) that toy making was clearly not for me....


However, after experimenting with Martha Stewart's bunnies

cute
scary


from her Encyclopedia of Sewing Crafts (well worth buying for the sheer number of projects alone) I thought 'maybe it's time to try making another  doll.

So I picked up Jan Horrox's book on cloth doll making and used it as a loose guide to see whether or not it was something I would enjoy, before buying all the extra notions and equipment.

And here she is:


If she's looking a little mean spirited, it's because my husband gave her angry eyebrows when he drew her face...
Not bad for a first attempt, I thought...

Creating her was a challenging, frustrating, and very rewarding experience, so I think investing in the little extras, will definitely be worth it.  

Can't wait to start on the next one!  (I think I will be brave enough to do the hands, next time....)


Friday 24 February 2012

Shift it!

This is a tutorial for a really easy, and super cute, 60's style shift dress.

The pattern has been cut for my shape and size (which is roughly a UK size 12) but it will need some adjusting for each individual, so be sure to make a toile before cutting the pieces from your main fabric.

First thing to do is print out the pattern provided in this link and you're ready to begin!

I used half an inch seam allowance, with exception of the back seam, where a full inch was used to accommodate the zip.

Cut the front pattern piece on the fold of the fabric.


That's just a regular dumb bell weight...
Cut one back piece, from the wrong side of the fabric, with the armhole facing your right; then cut a second piece by turning the pattern piece over so that the armhole faces to your left.


Pin and sew the back pieces to the front piece, making sure that the shoulders are aligned.  


You should end up with something looking rather like this:


Now is the time to add the darts or pleats.  You will want to start from just under the bust and go down to your natural waist.

I chose to use use pleats as the material I used was, essentially, upholstery fabric and wasn't going to drape well without some help.  The darts or pleats in the back are down to your discretion - the material I used had so little 'give' in the weft that I couldn't make it too fitted.... 

You can find a 'how to' for darts in this previous tutorial.


Now you need to measure and mark where your zip will sit along the back seam. (If you have quite heavy material, I would suggest that the zip reaches the bottom of your rib cage, at least.)


(For those of you who have trouble with zips, here's a brilliant video tutorial from Threadbanger) plus more detailed instructions in my pencil skirt tutorial.

Sew the back seam, making sure to use a basting stitch where the zip is due to sit.
Open up the seam and press.


Pin the zip into place and make sure you switch to the zipper foot before sewing.


Once the zip has been sewn into place, cut open the basting stitches with a seam ripper or embroidery scissors.

That's probably the most difficult part over!


(Including the hemline that I forgot to take a picture of!)


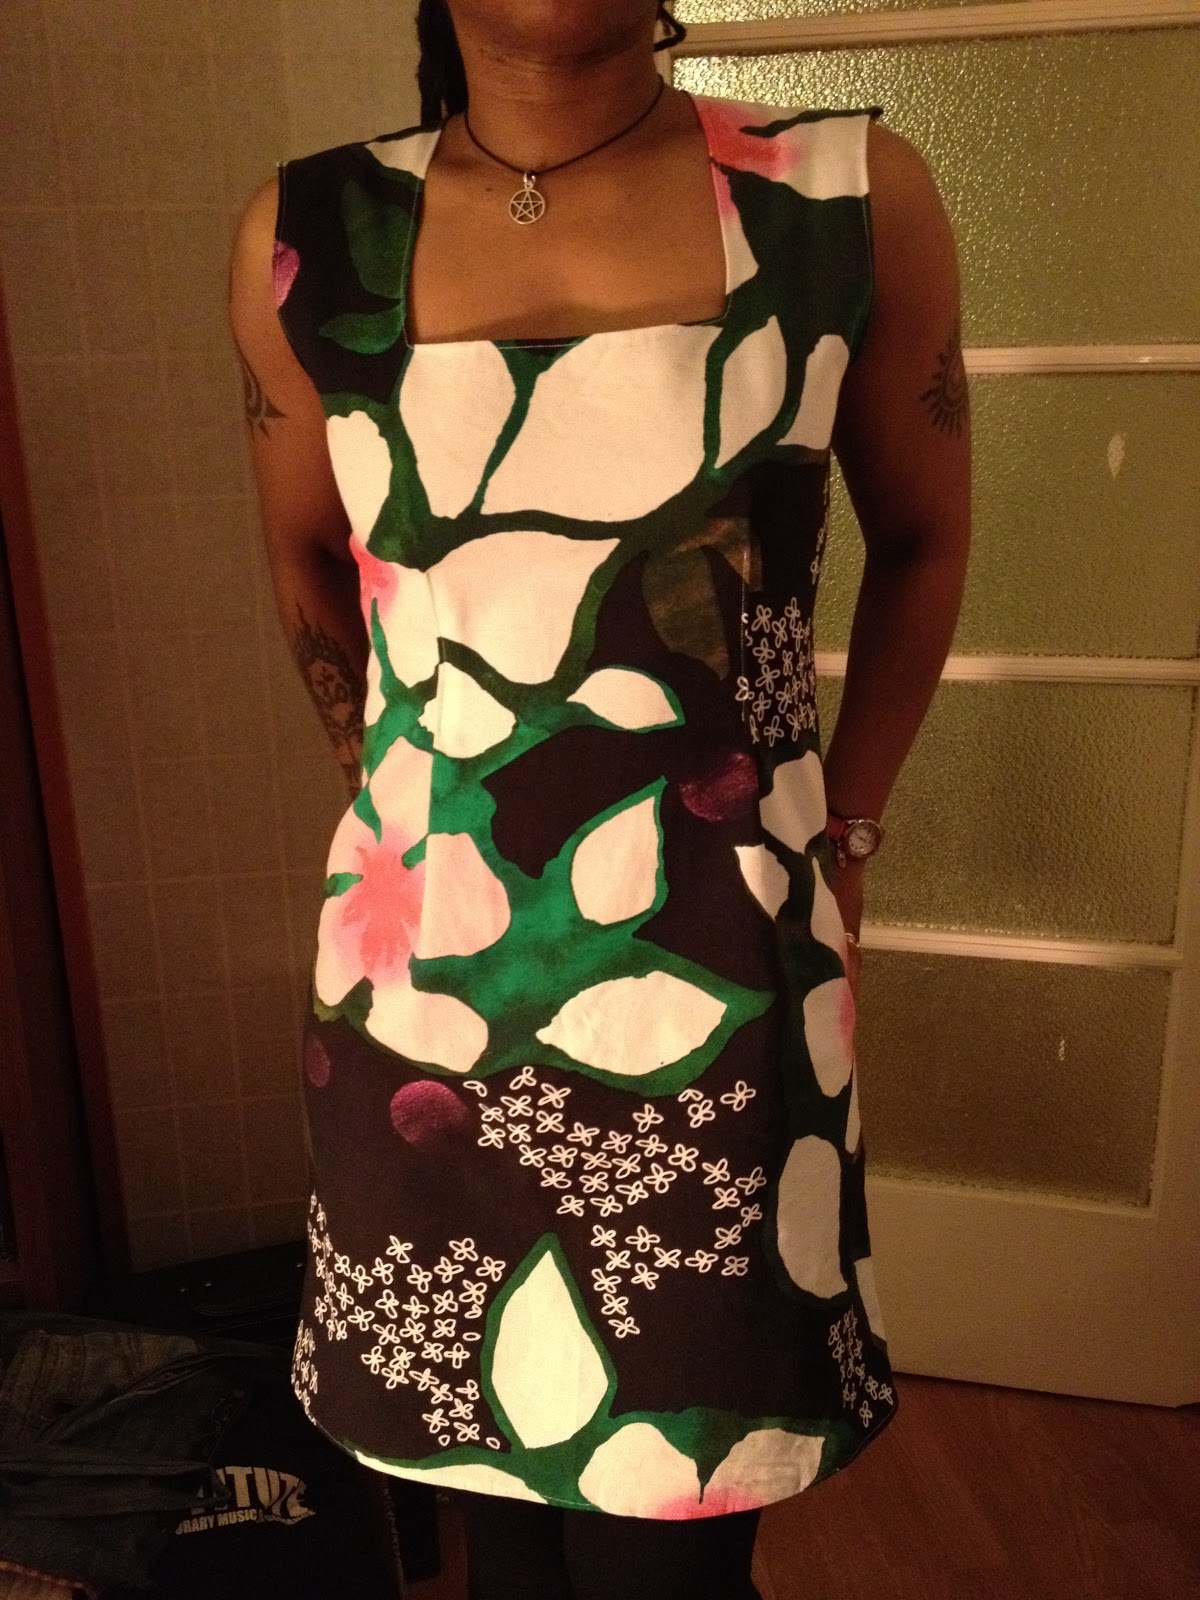
And you finish with something that looks rather like this: